Pool Management
To work with Pools in Mojo, a few facts need to be understood:
- A Resource is something that Mojo can manage, it can be a server, a switch, a PDU, etc.
- A Resource in Mojo can belong to a single Pool
- A Pool is a logical group of Resources that have the same user permissions applied to them
- A Group is a collection of Users and Roles
- A single Group is assigned to each Pool to control permissions on its Resource
By default, Mojo come with a Default Pool and a Default group. Users that are members of the Default group have access to all Resources in the Default Pool. On small Mojo installs with only a single active user, the Default Group and the Default Pool can be used for everything. In larger deployments with different user permission requirements, the Groups and Pools should be constructed to meet permission requirements.
Create a Resource Management Pool
In this use case, we will create a new Pool for just one of our Resources so a specific user group can manage the Resource. This is a common use case for Mojo, where a specific Group of Users needs to be able to manage a specific set of Resources.
Create User
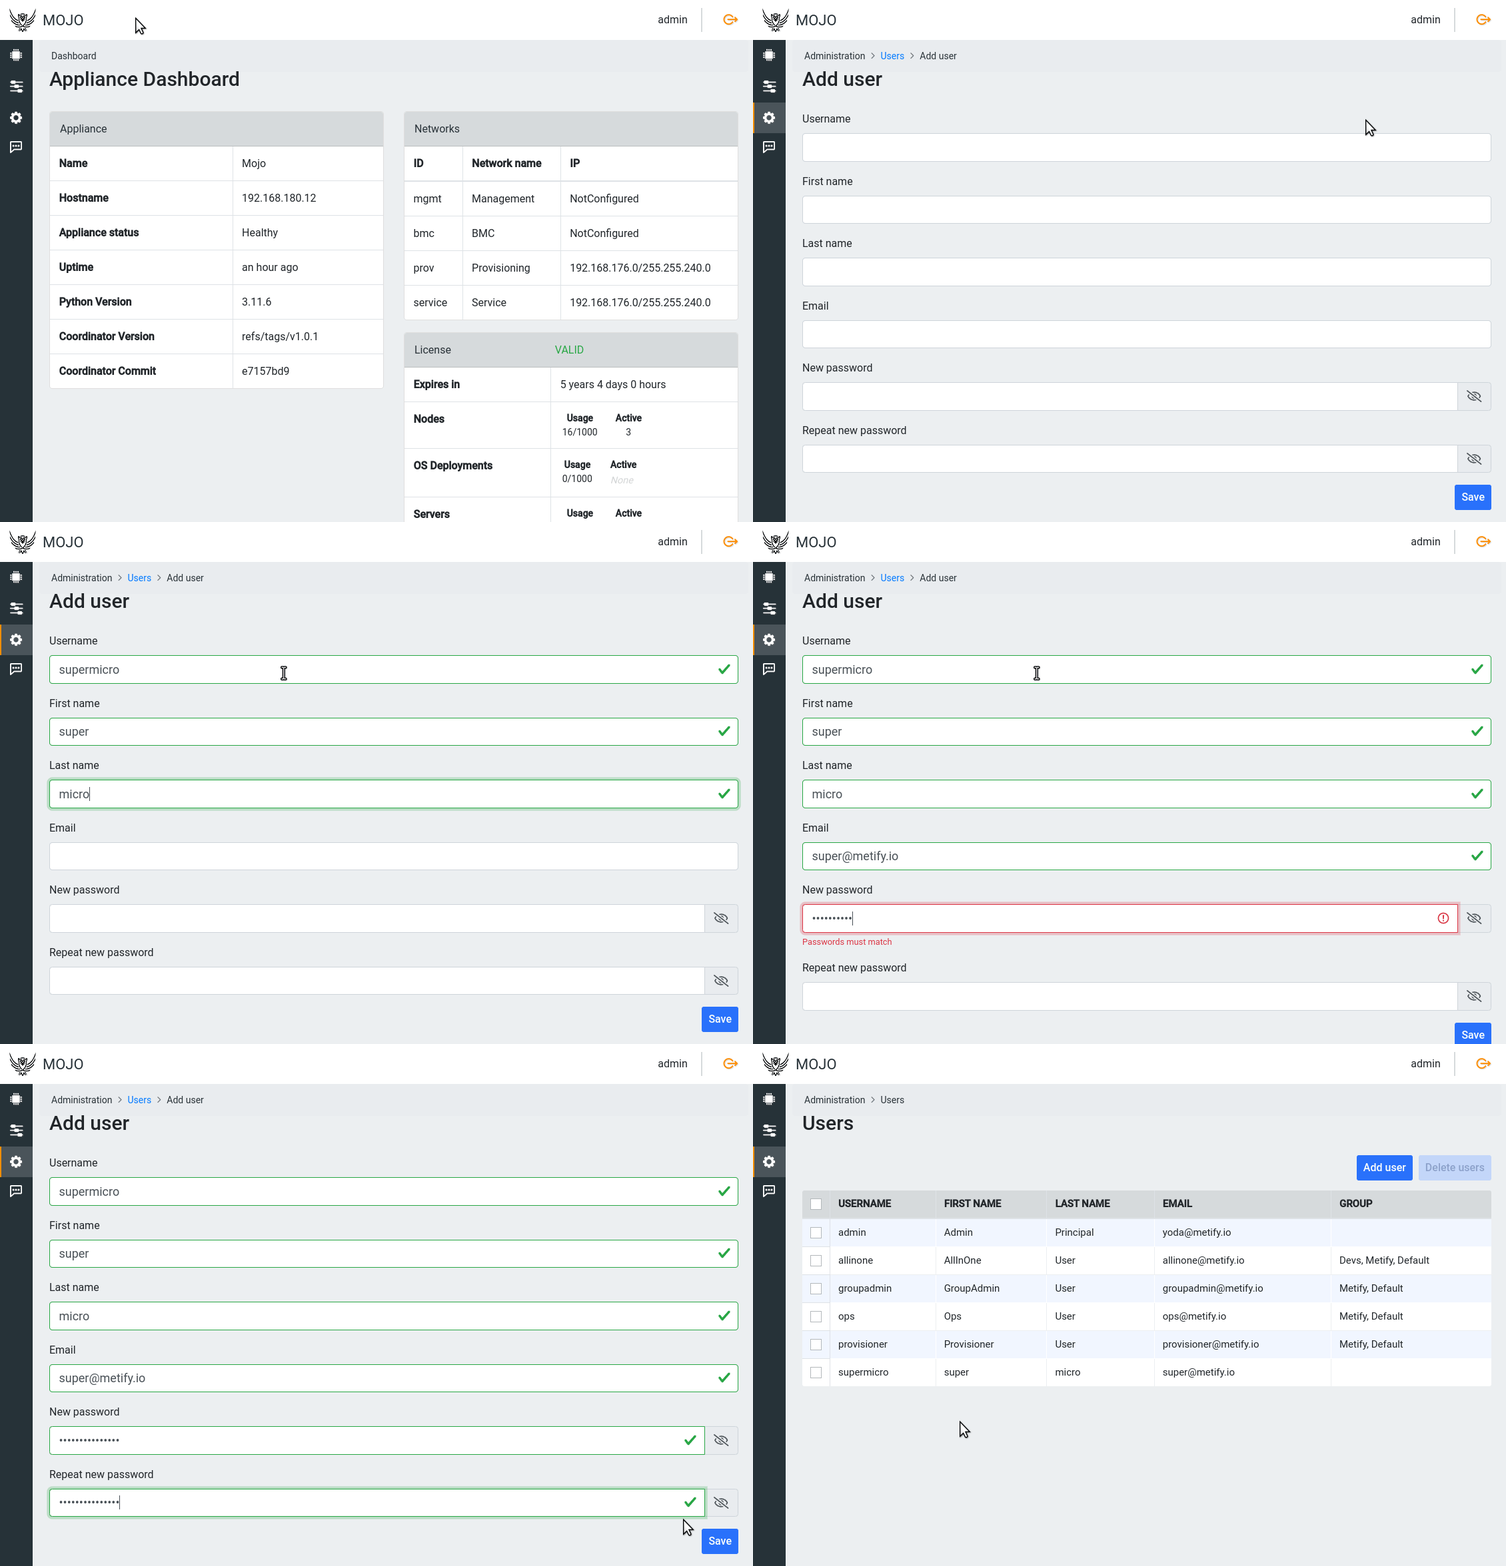
Create a new user called “supermicro”. Under “Administration” in the left navigation, select “Users” and then click the blue “Add user” button on the right side of the screen. Fill out the form and click “Save”.
Create Group
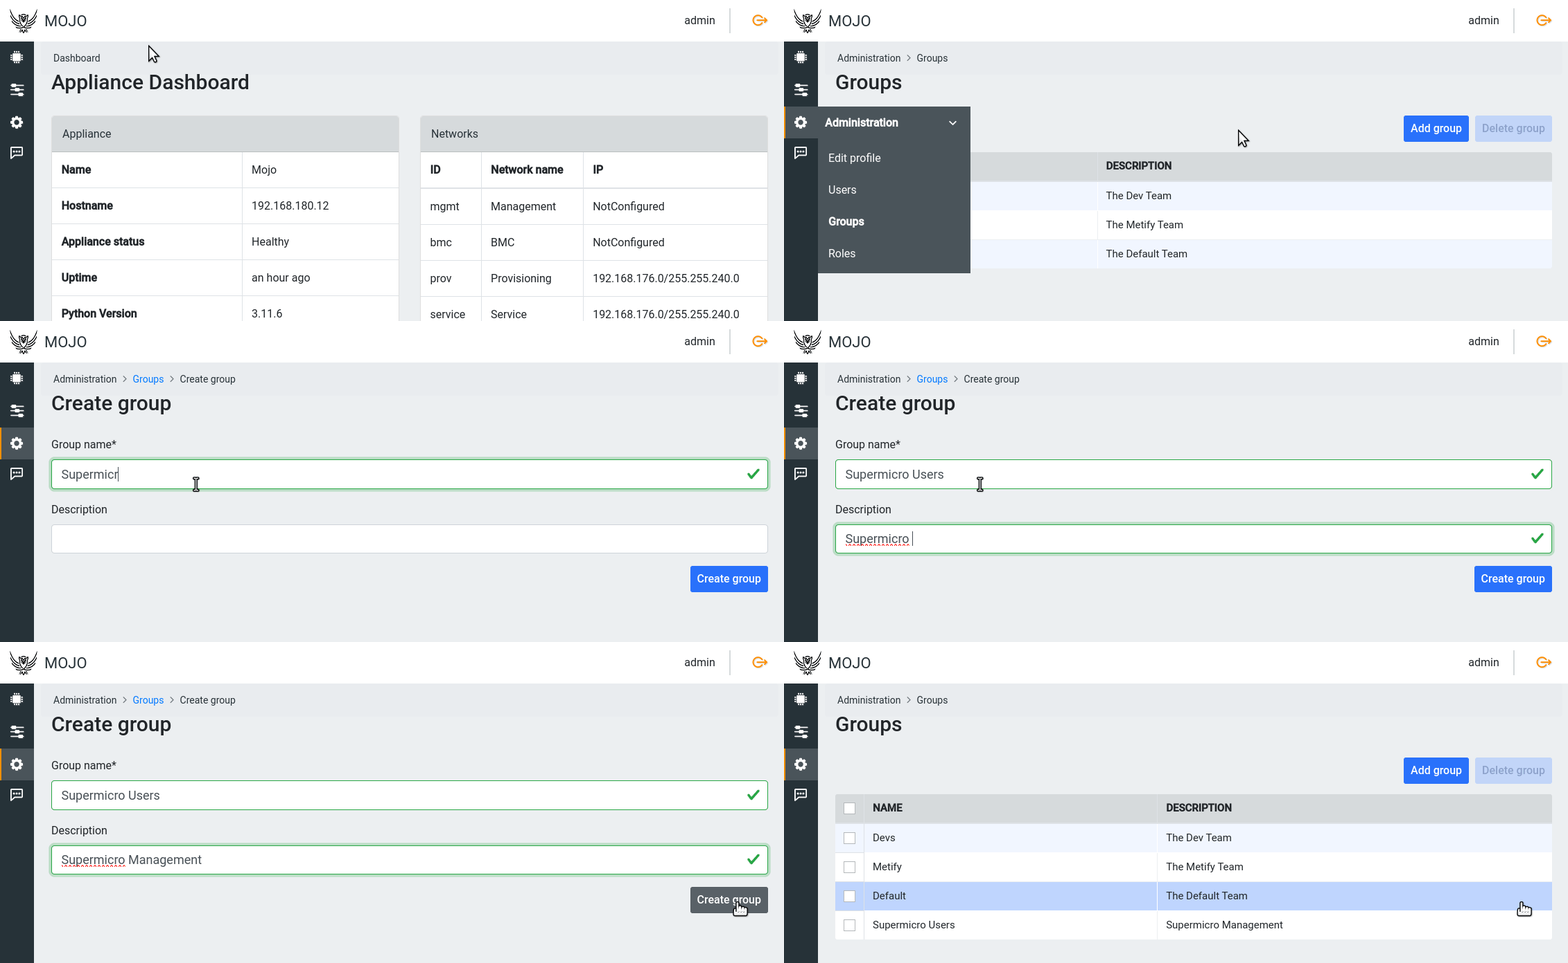
Create a group called “Supermicro Users” for all users that can manage Supermicro servers. Under “Administration” in the left navigation, select “Groups” and then click the blue “Add group” button on the right side of the screen. Enter the Group information and press the “Create group” button.
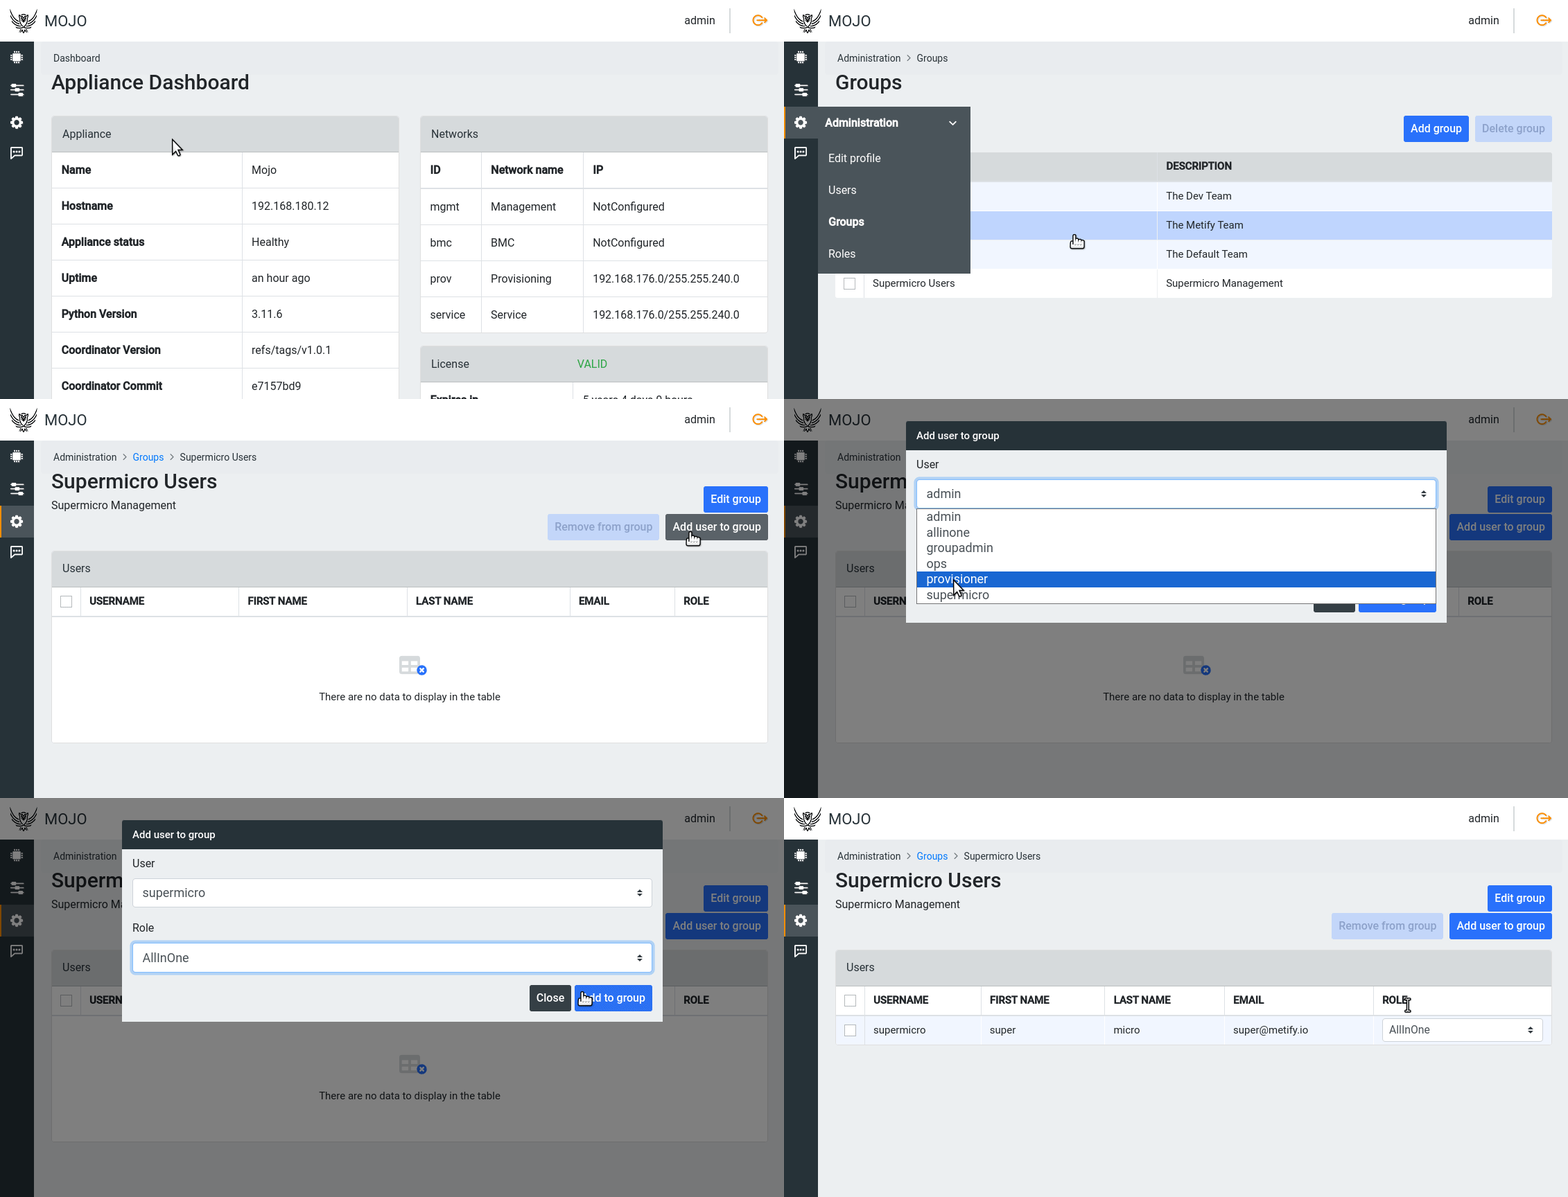
Add the “supermicro” user to the “Supermicro Users” group as someone who can do everything. In Mojo this is called the “AllInOne” role. Under “Administration” in the left navigation, select “Groups”,
then click on the “Supermicro Users” row. Click “Add user to group” in the top right and choose the “supermicro” user and the “AllInOne” role.
Create Pool
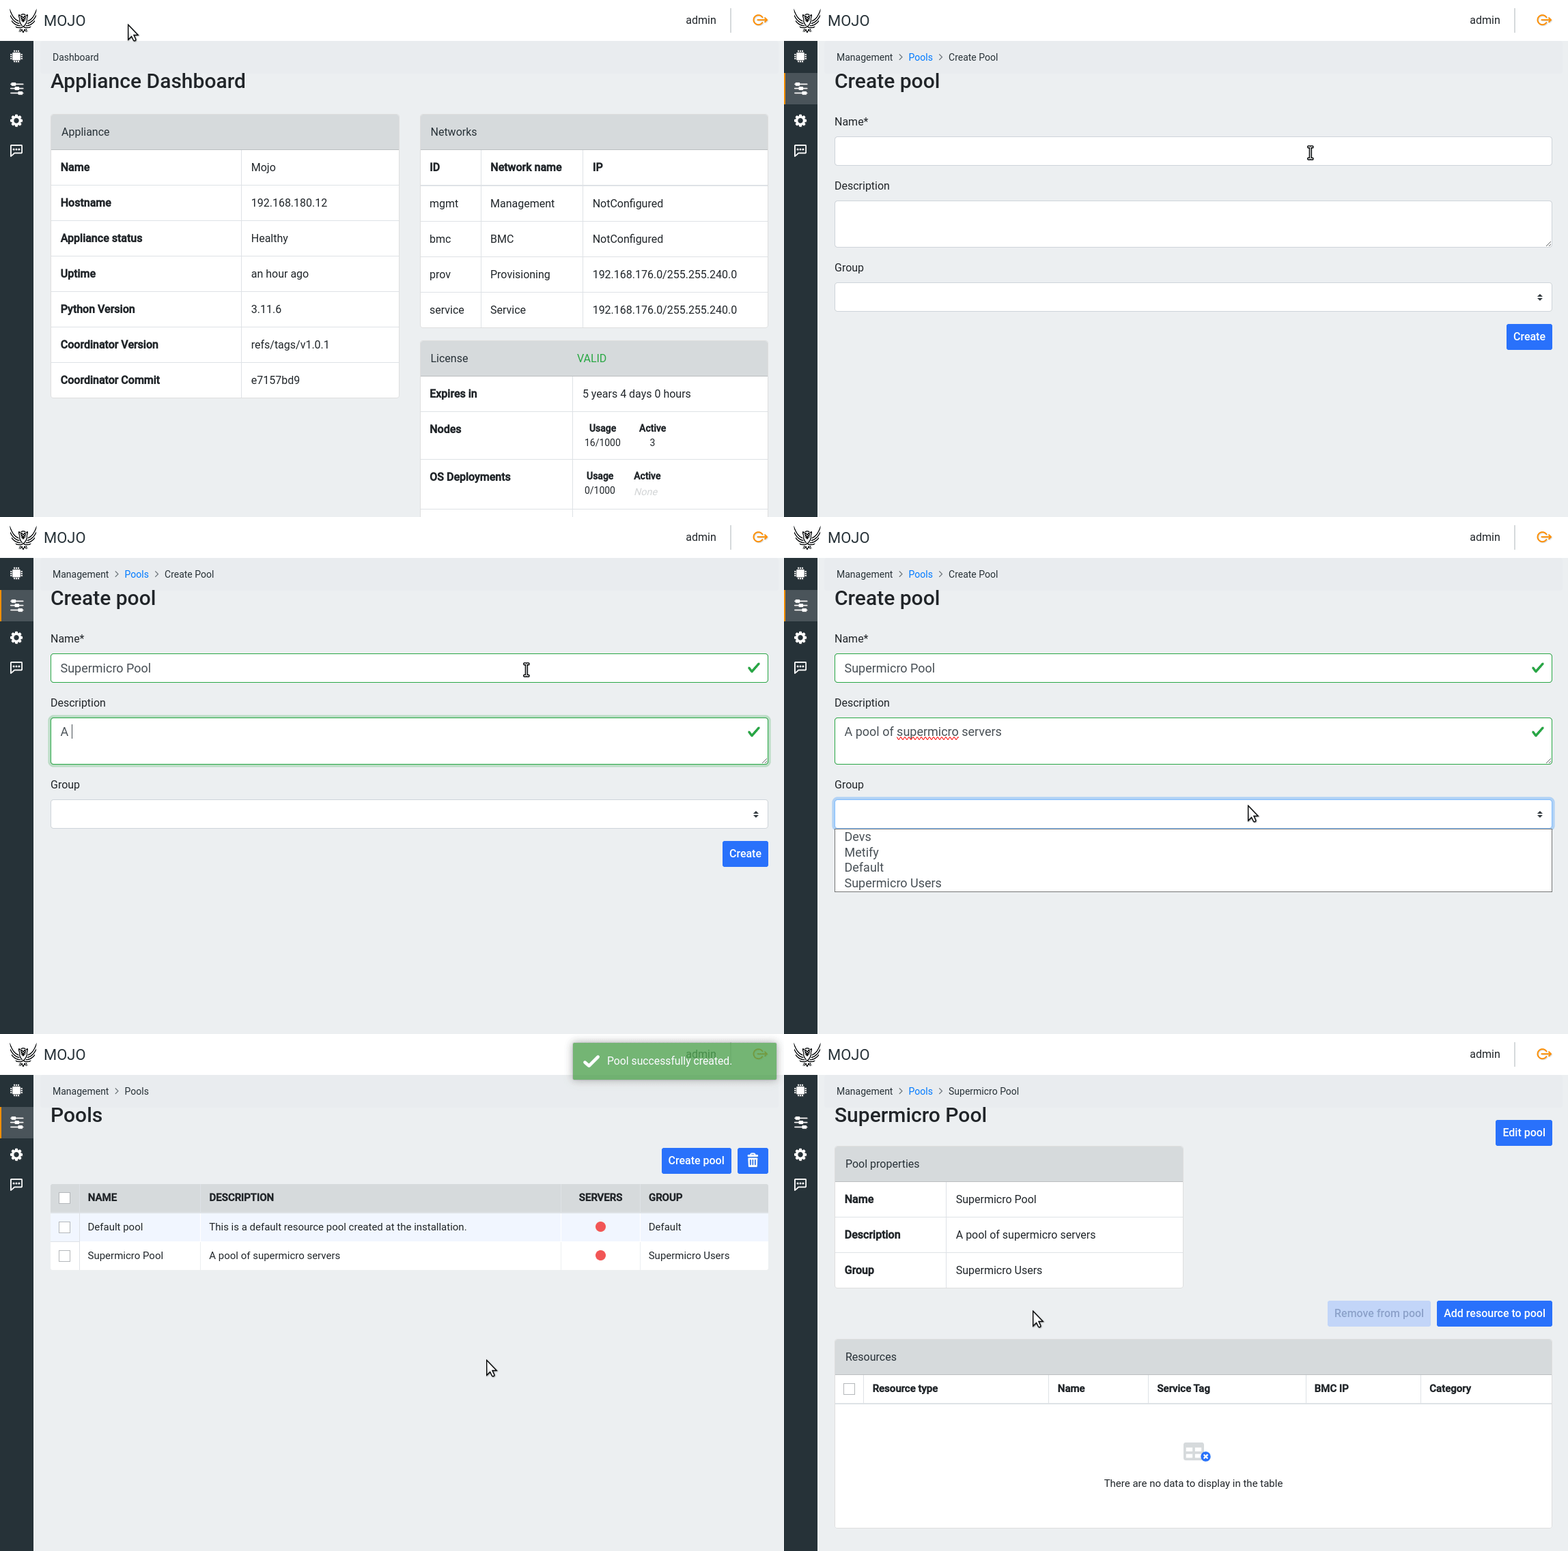
Create a Pool called “Supermicro Pool” and assign the “supermicro” group to the Pool. Under “Management” in the left navigation, select “Pools” and then click the blue “Create pool” button on the right side of the screen. Enter the Pool information and press the “Create pool” button.
Add Resource to Pool
There are many wants to add a Resource to a Pool. You only need to perform one of the following methods to add a Resource to a Pool.
Pool Detail Page
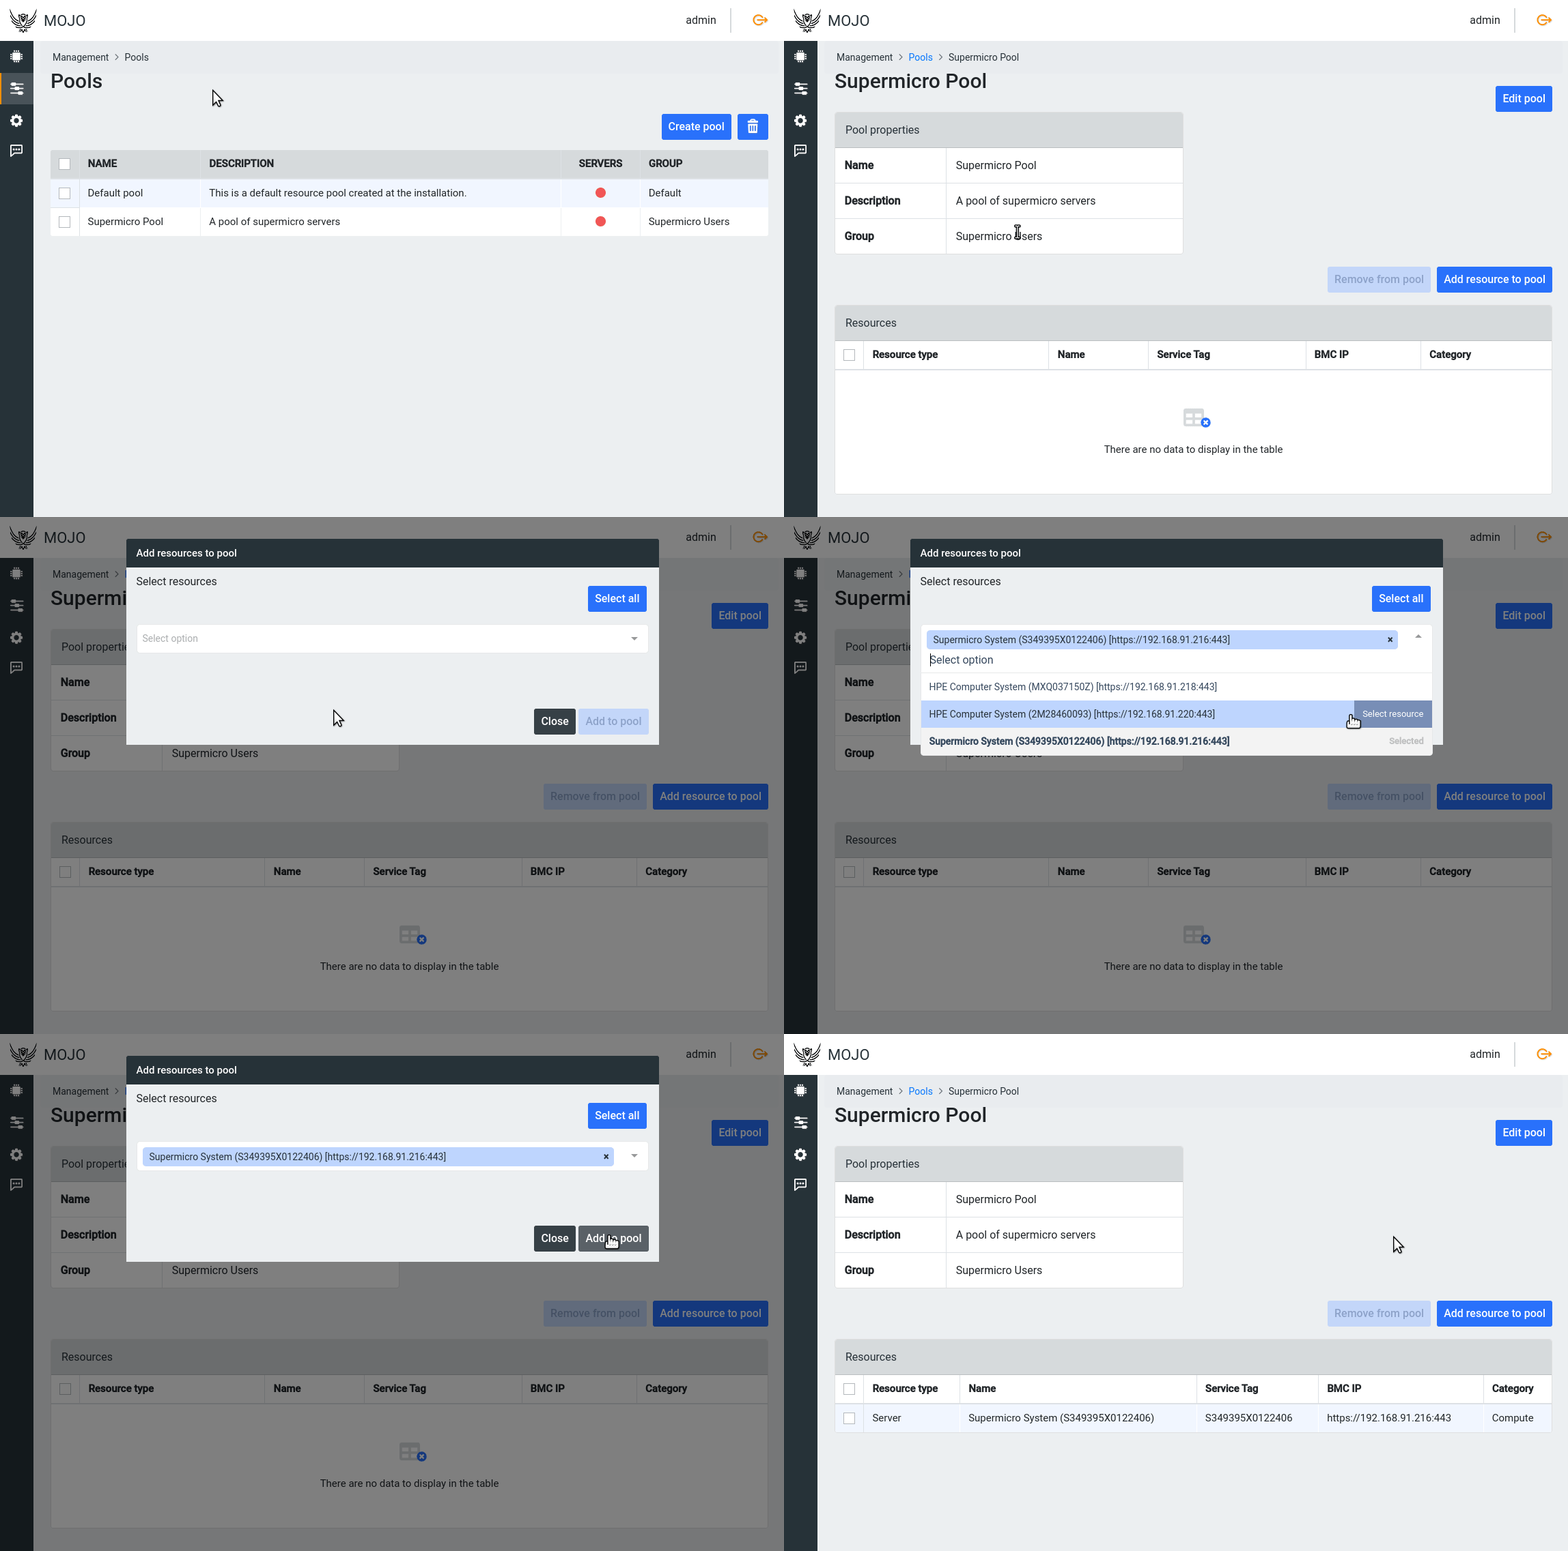
You can do so from the Pool detail page by clicking on an individual pool in the Pool list.
Server List Page
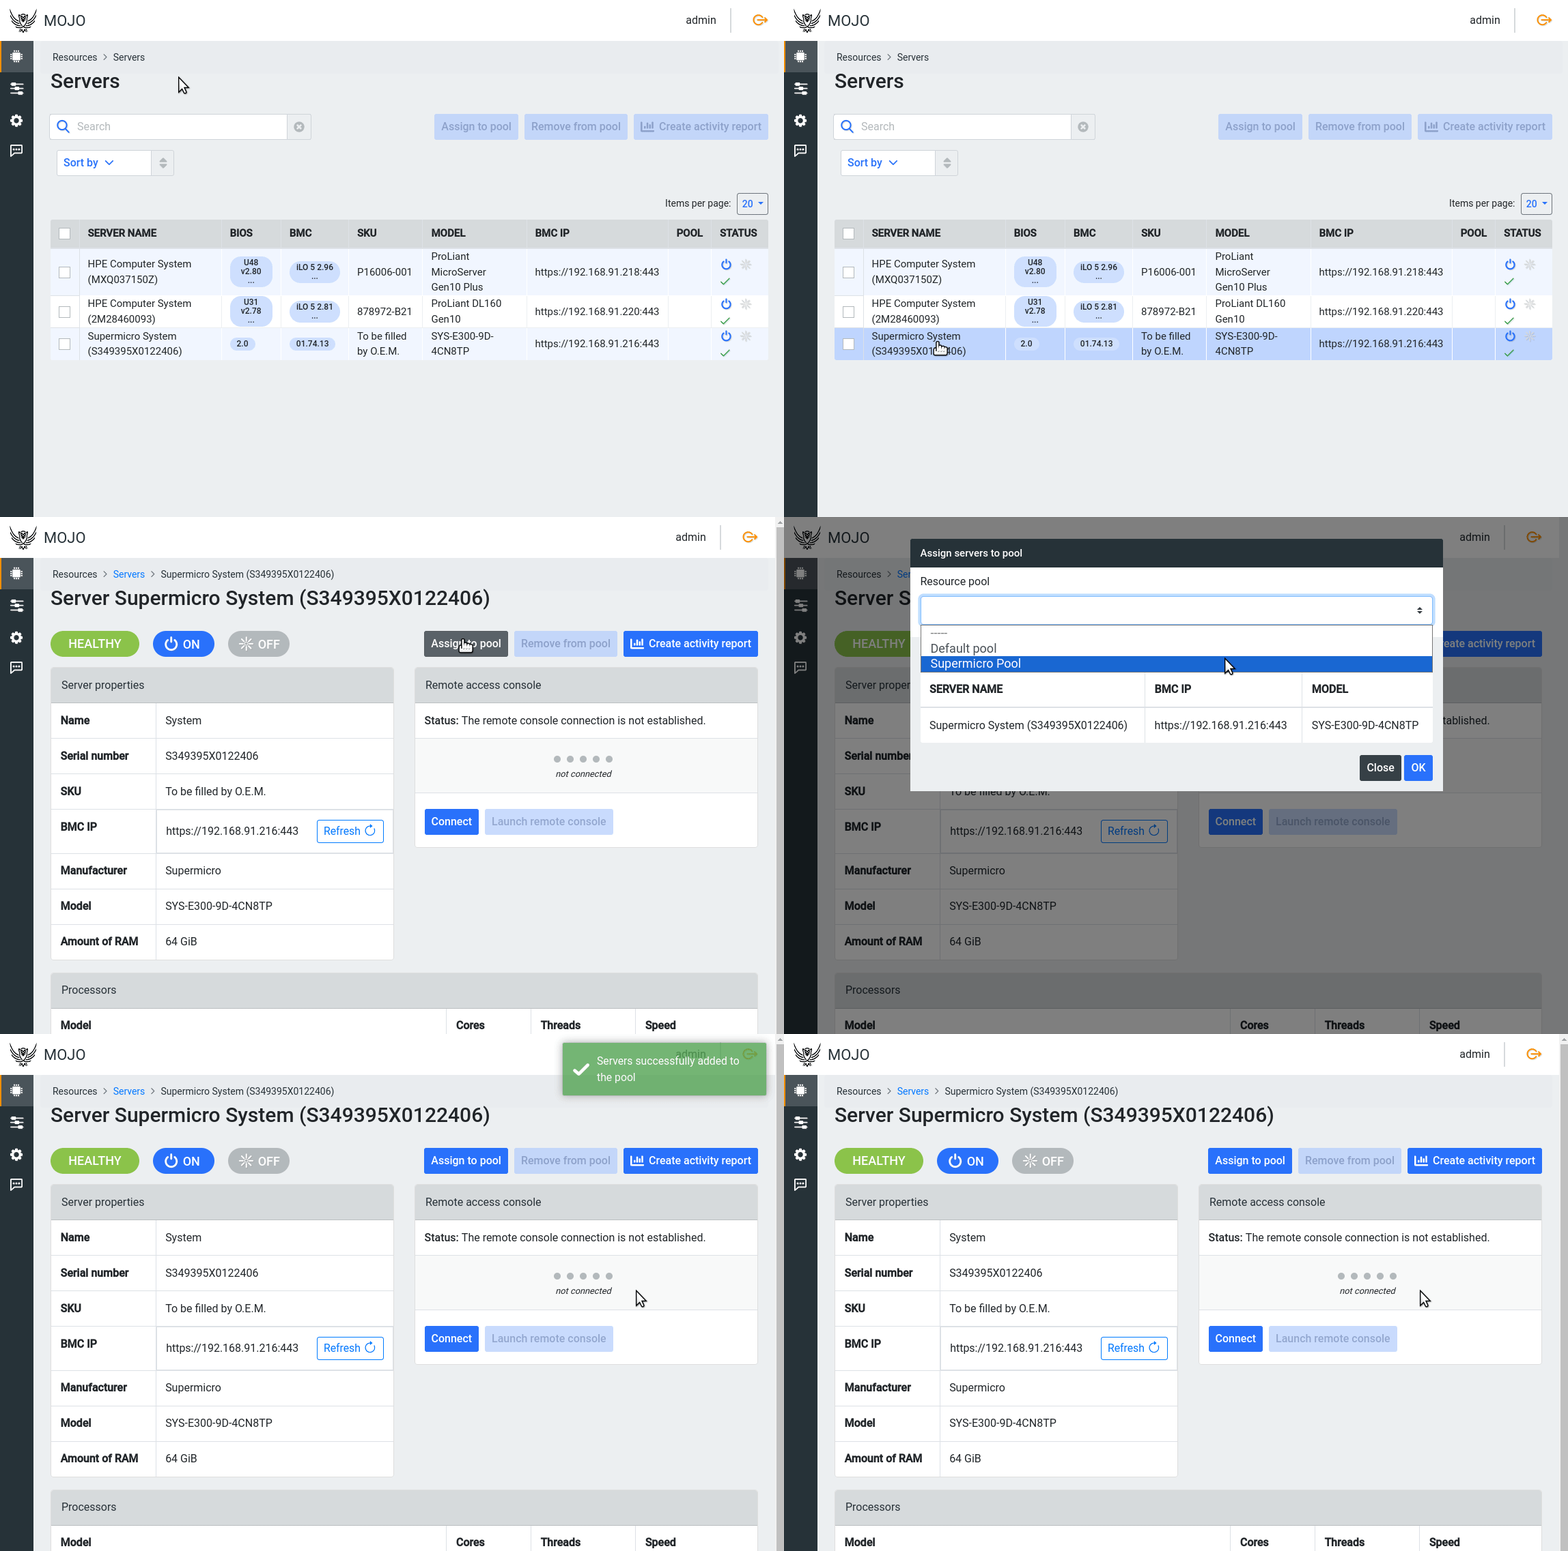
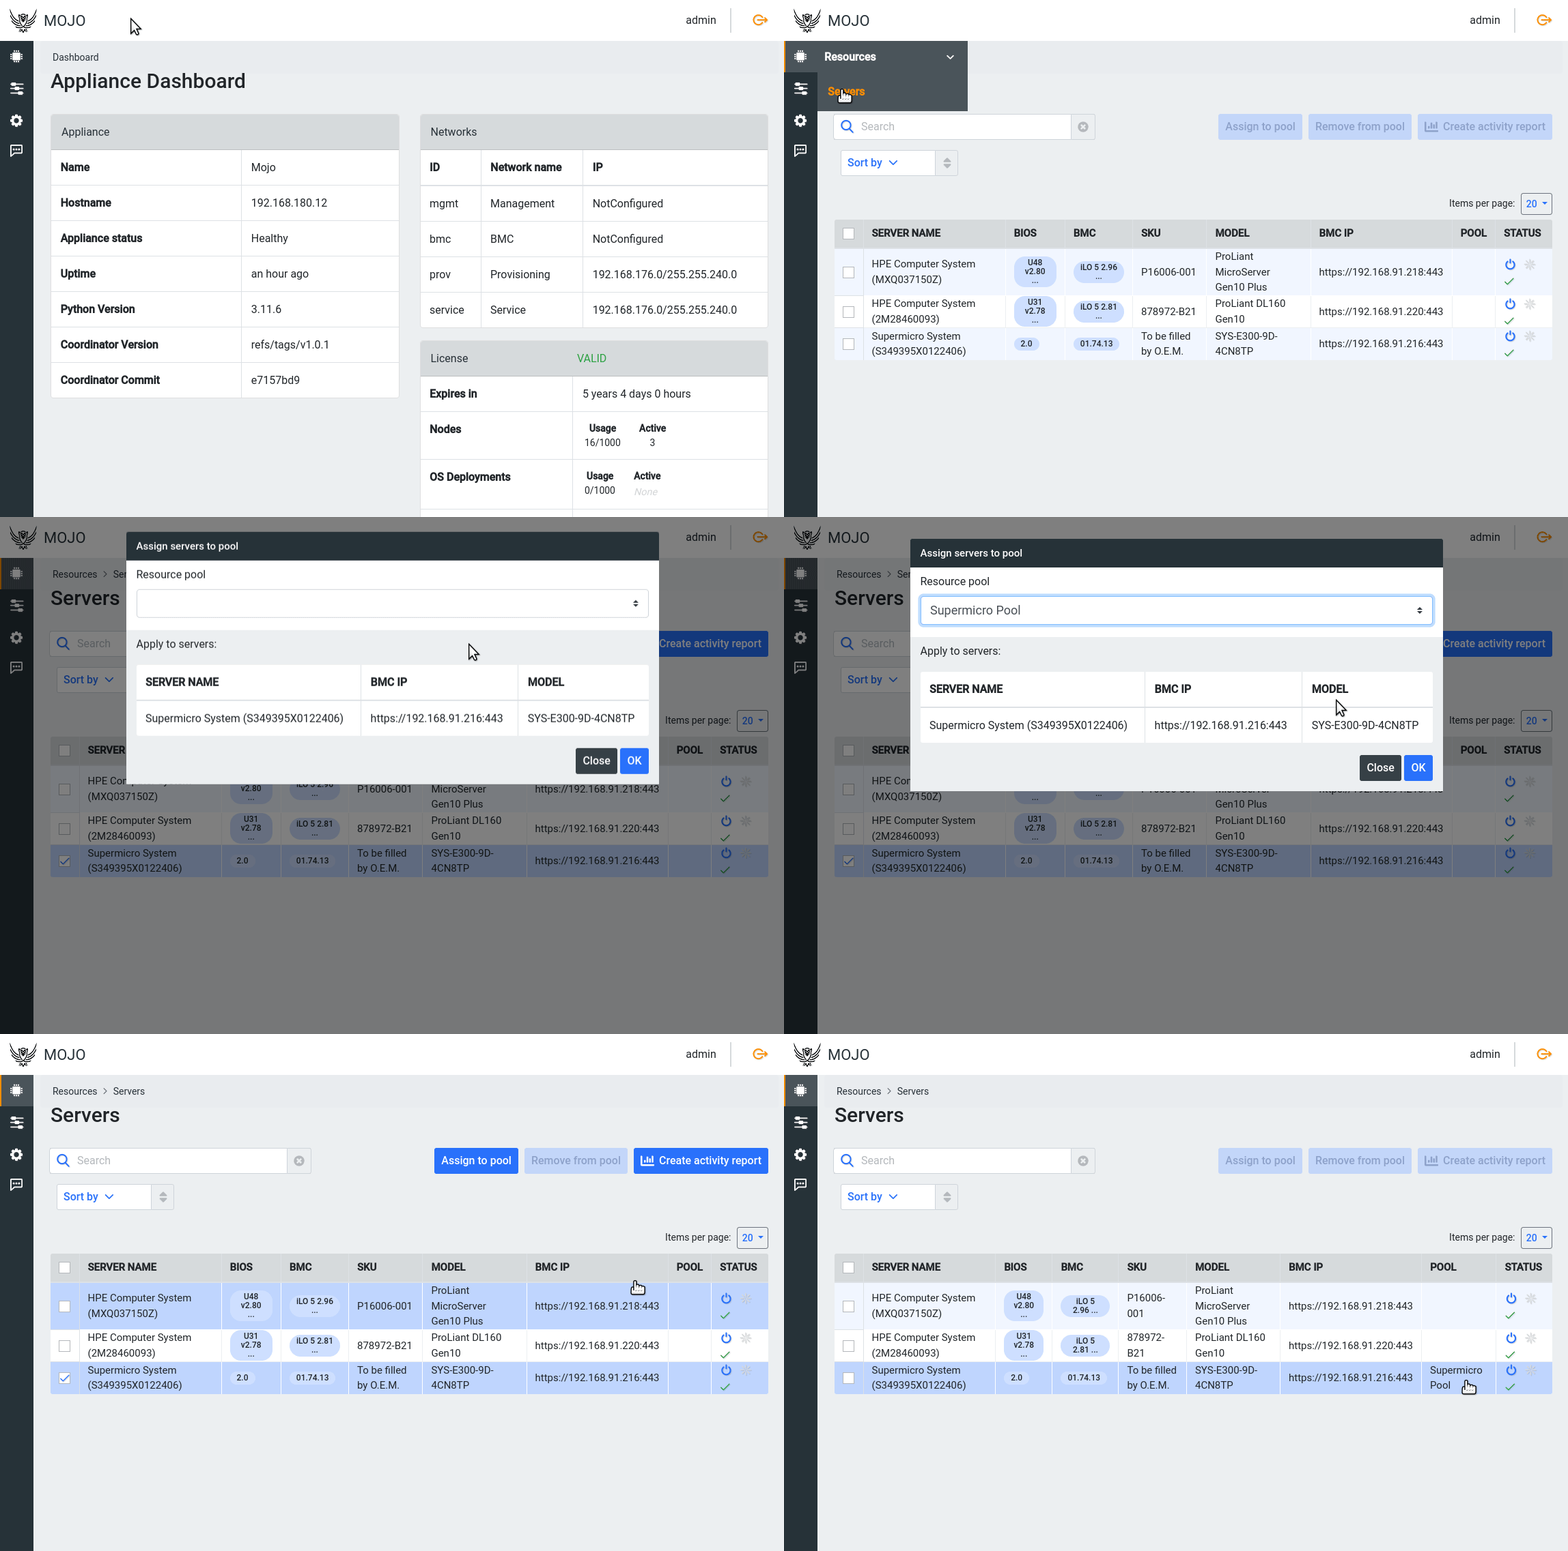
Another way is to go to the Servers page (Servers are a type of Resource) and selecting the rows you wish to add to a Pool and then clicking the “Assign to pool” button on the right side of the page. This will open a modal window where you can select the pool to assign the server to.
Server Detail Page
A Server can also be added to the pool directly on its detail page. Click on the Server in the server table and then the blue “Assign to pool” button on the right side of the page. This will open a modal window where you can select the pool to assign the server to.
